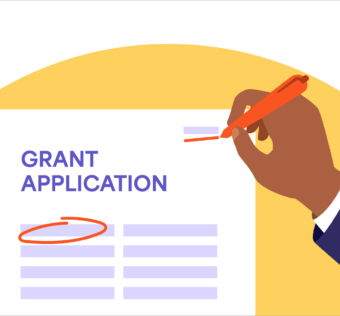
How To Make Your First Givelify Donation
Have you recently discovered that your favorite nonprofit or place of worship accepts mobile donations using the Givelify app? Do you work for a Givelify member organization and want simple, easy-to-follow directions to share with your donors? You have come to the right place.
First, download the free Givelify mobile donation app from the App Store or Google Play. Then open the app and follow these step-by-step instructions to make your very first Givelify mobile donation:
Finding Your Church or Nonprofit
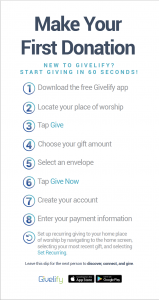
To locate the church or nonprofit you wish to donate to, you have two options:
- If you are within a 2 mile radius, you can use the Nearby tab and find the organization on the GPS map.
- Note: To use the Nearby feature, your device must have location services turned on. Also make sure that the Givelify app has permission to access your location.
- To search for the organization:
- Tap the Search tab at the top of your screen.
- Select whether the organization is a church or nonprofit.
- Enter the organization’s name, city, and state into the spaces provided.
- Tap Search.
- Find the organization in the list of results and tap Give To.
Making Your First Donation
Once you find your church or nonprofit’s app profile, tap the green Give button. Then follow these steps:
- Select the amount you would like to donate, or tap Other to enter a different amount.
- Select a donation envelope.
- Tap Give Now.
Create Your Giving Account
To complete your first donation, you will need to create an account. Follow these steps:
- On the popup, tap Sign Up.
- Choose Sign-in with Facebook or Sign Me Up by E-Mail.
Signing up by e-mail:
- Enter your name, e-mail address, and password into the spaces provided.
- Tap the green Sign Me Up button.
- Ane-mailwillbe sent to the address you provided with an activation link. To activate your account, click the link in the e-mail.
- Note: You can complete your first donation before clicking the activation link.
- In the app, tap Continue.
Completing Your First Donation
Now that you have created an account, you will be able to complete your donation. Follow these steps:
- Tap the green Give Now button.
- When prompted with a reminder about your activation e-mail, tap Cancel.
- Securely enter your payment information in the spaces provided.
- Complete your donation.
Future Donations Will Be a Breeze
Now that you have completed your first church or nonprofit donation using Givelify, future giving will be a piece of cake. You will be able to give in just three taps, with no prompts to create an account or enter payment information.
To make the process even more simple, save the organizations you give to the most as Favorites or your Home Church using the star and heart icons on their profile. To learn more tips on setting up your Givelify account, visit our launchpad website.
Recommended for you
About the Author